
A Long Weekend in the Berkshires
Four days. No plans. The highlights: A lazy drive on Hwy 7 through Vermont and Massachusetts. A visit to The Mount, Edith Wharton's home in Lenox, MA from 1902 until…
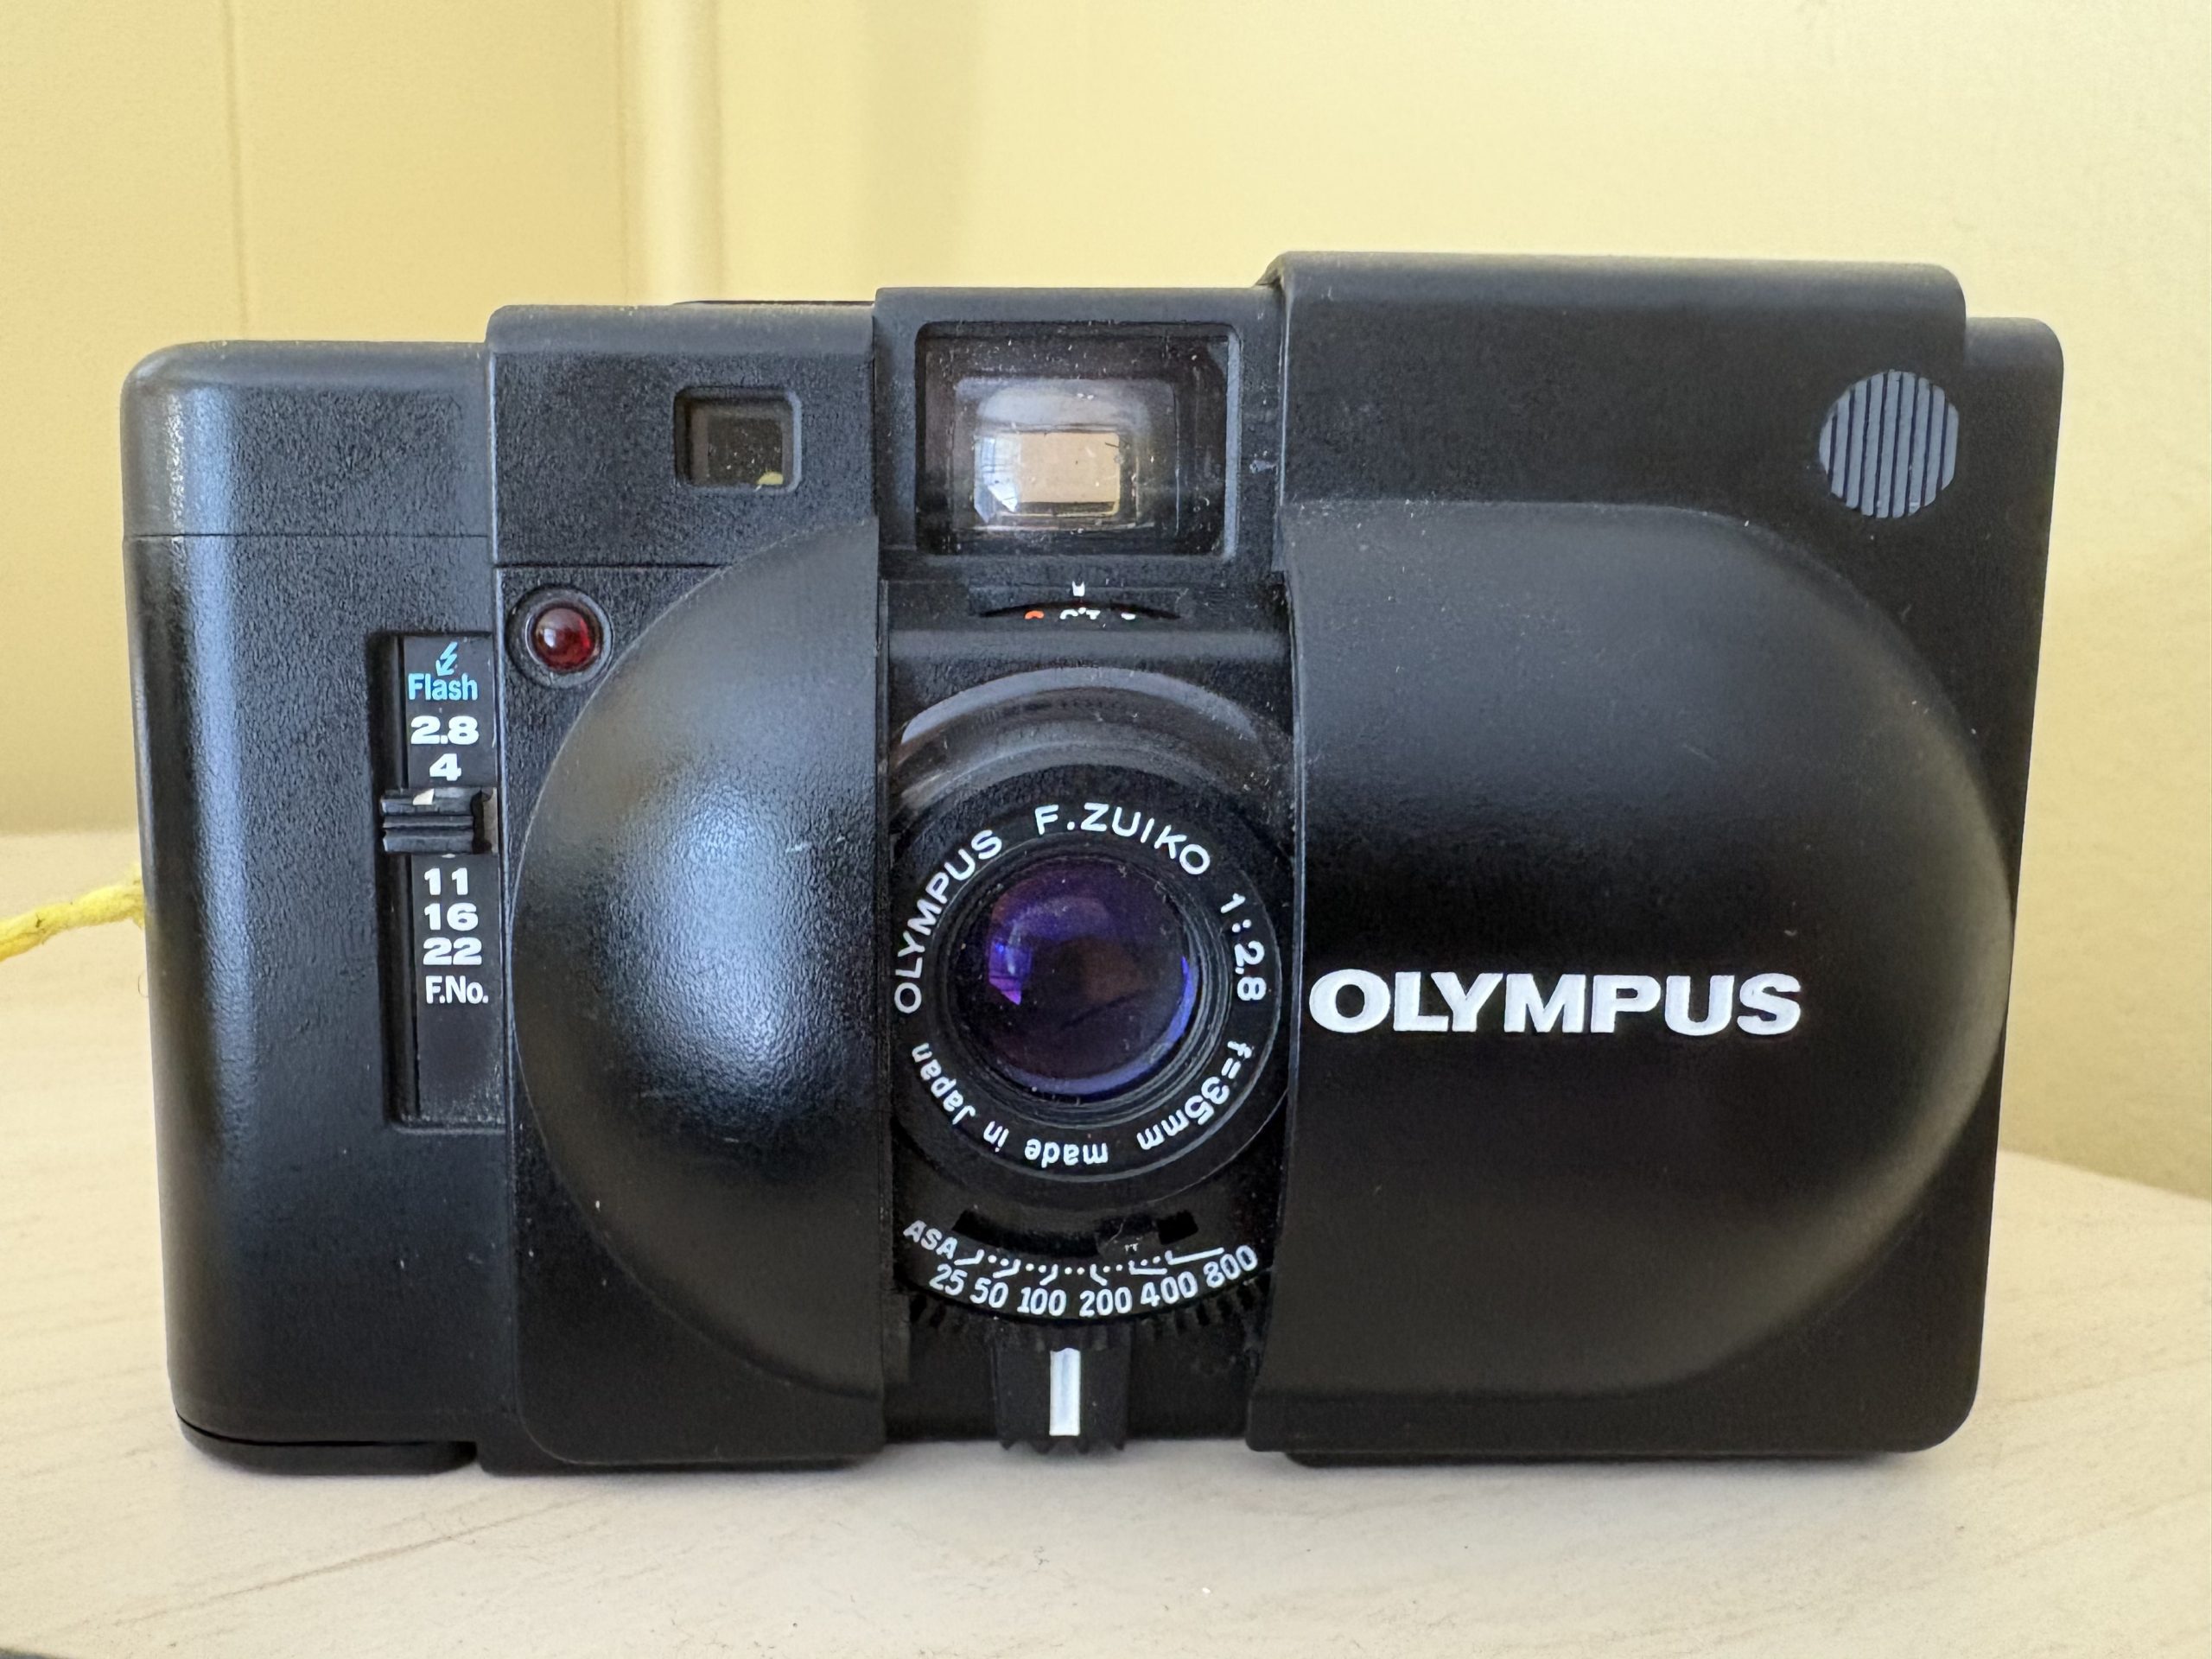
Olympus XA
I was hired for my first retail job by a family friend who sold camping gear. He wanted to see if he could sell cameras, too. I was 15, an…
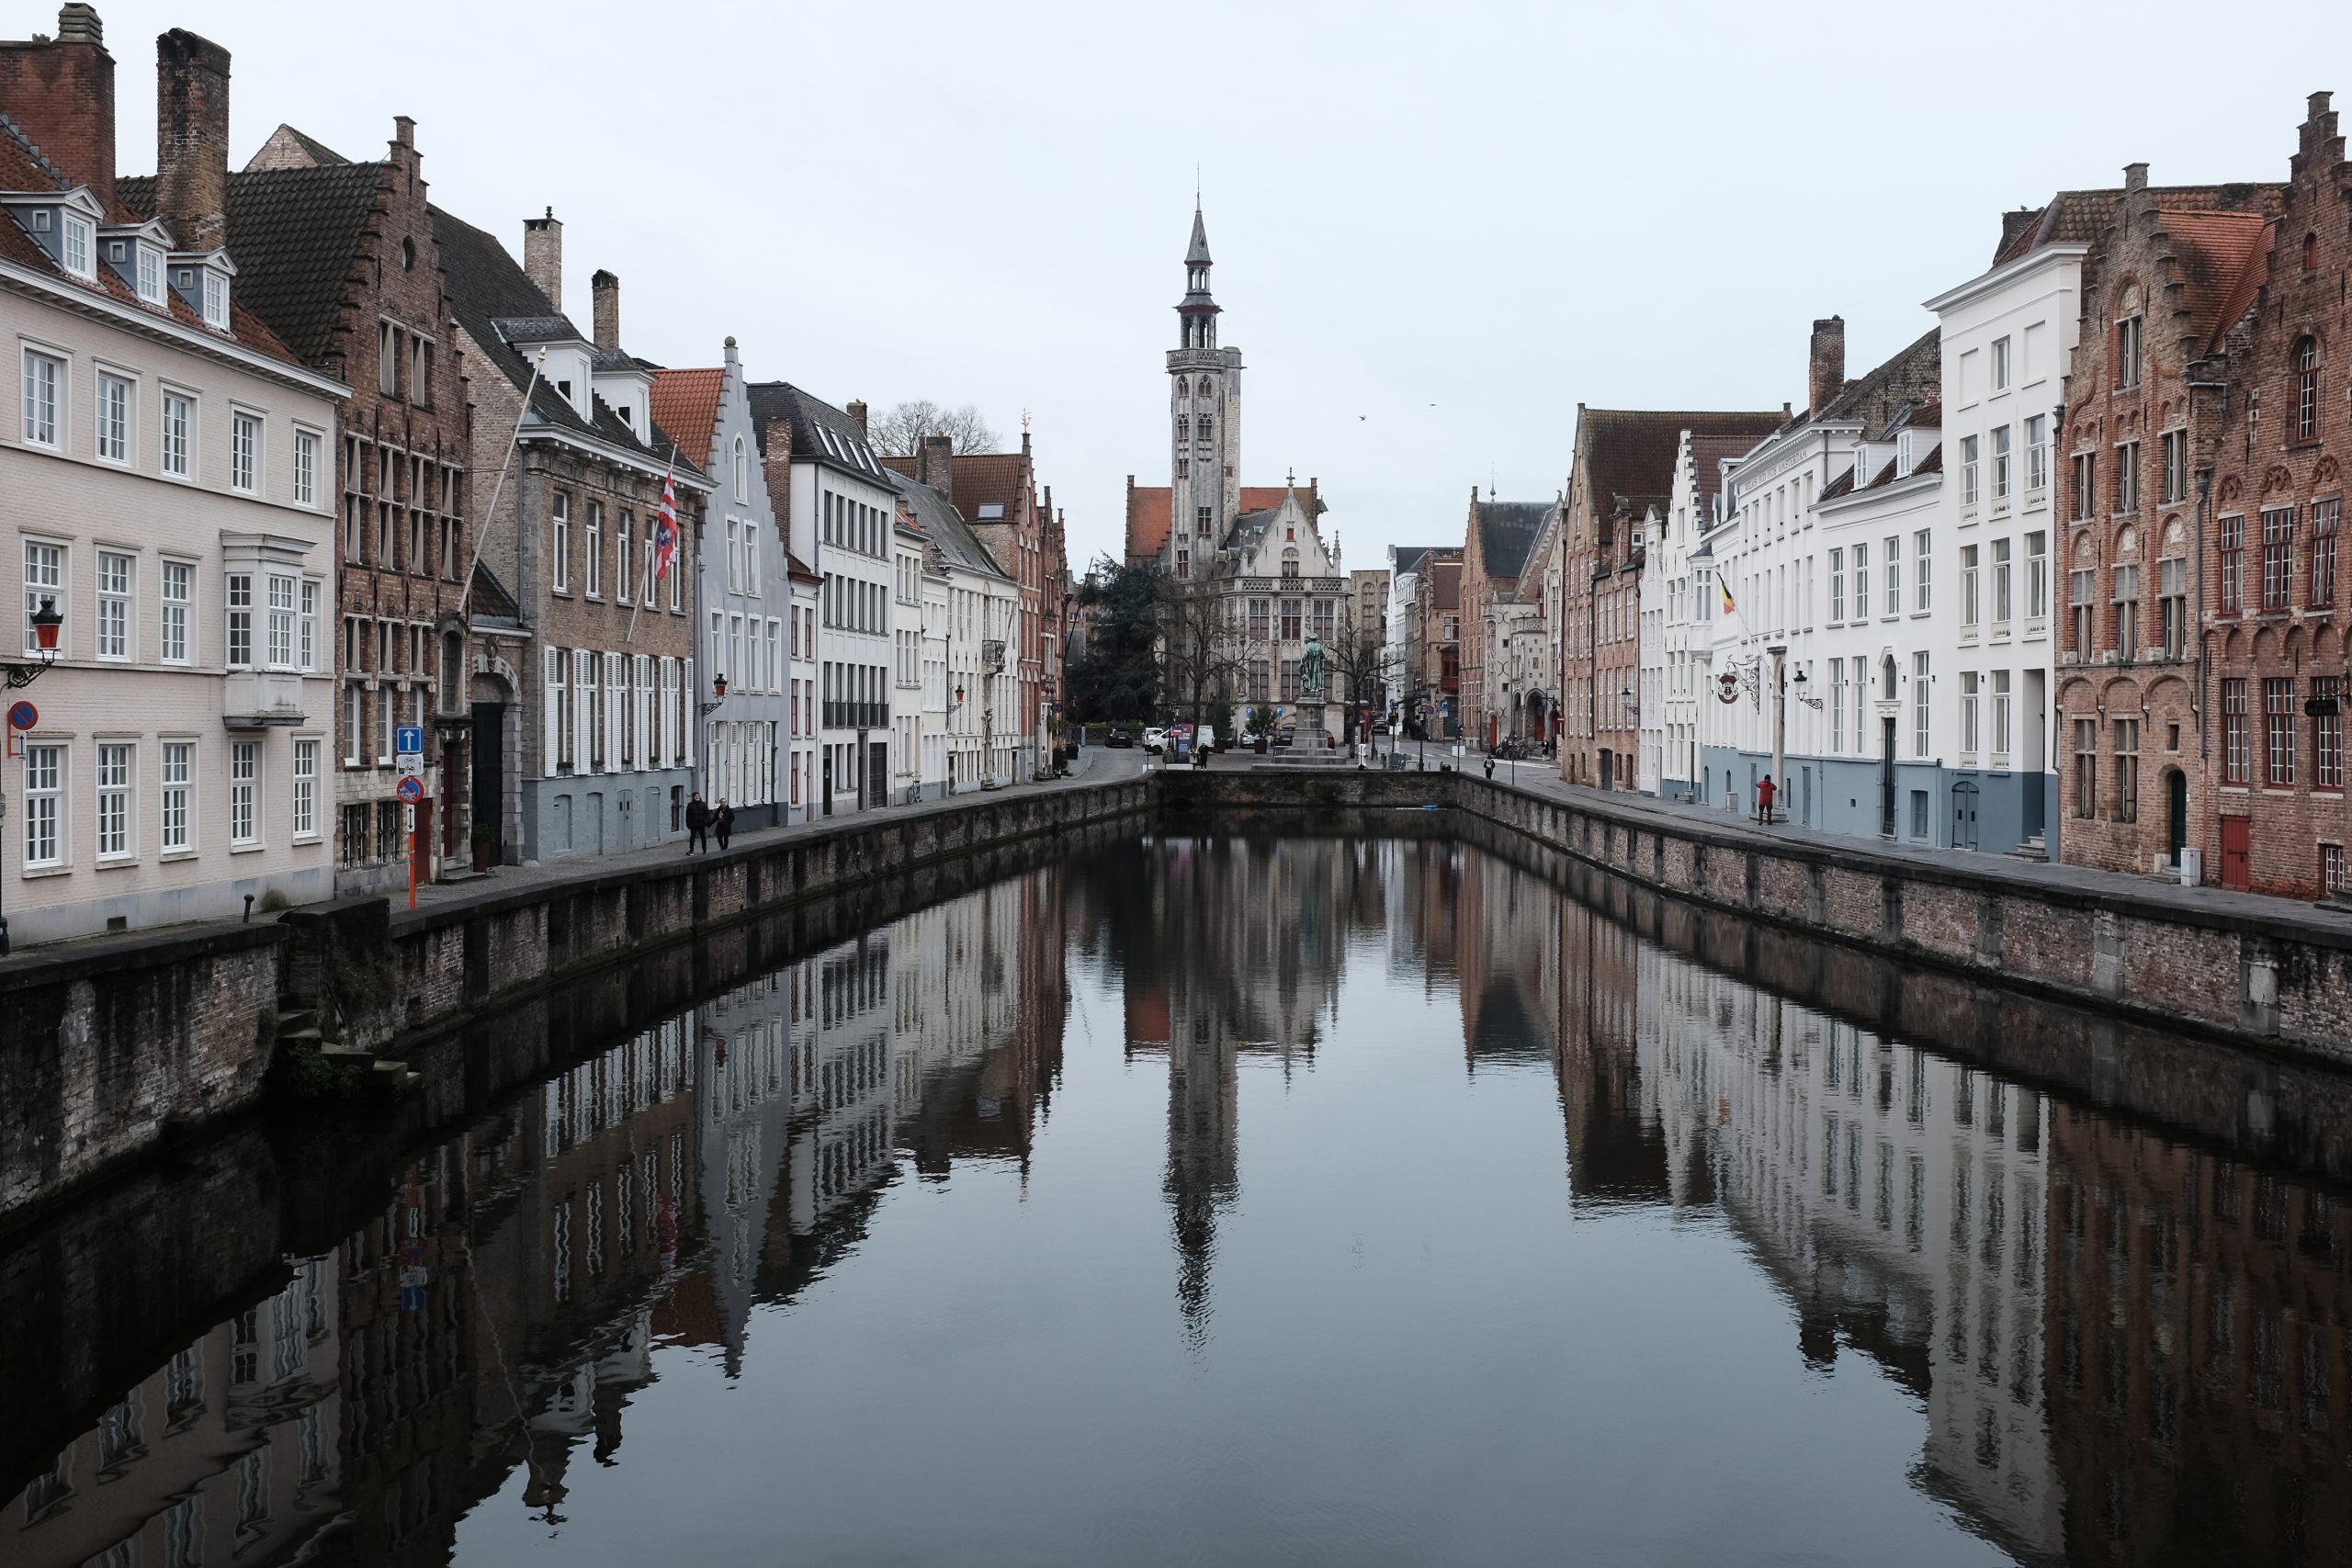
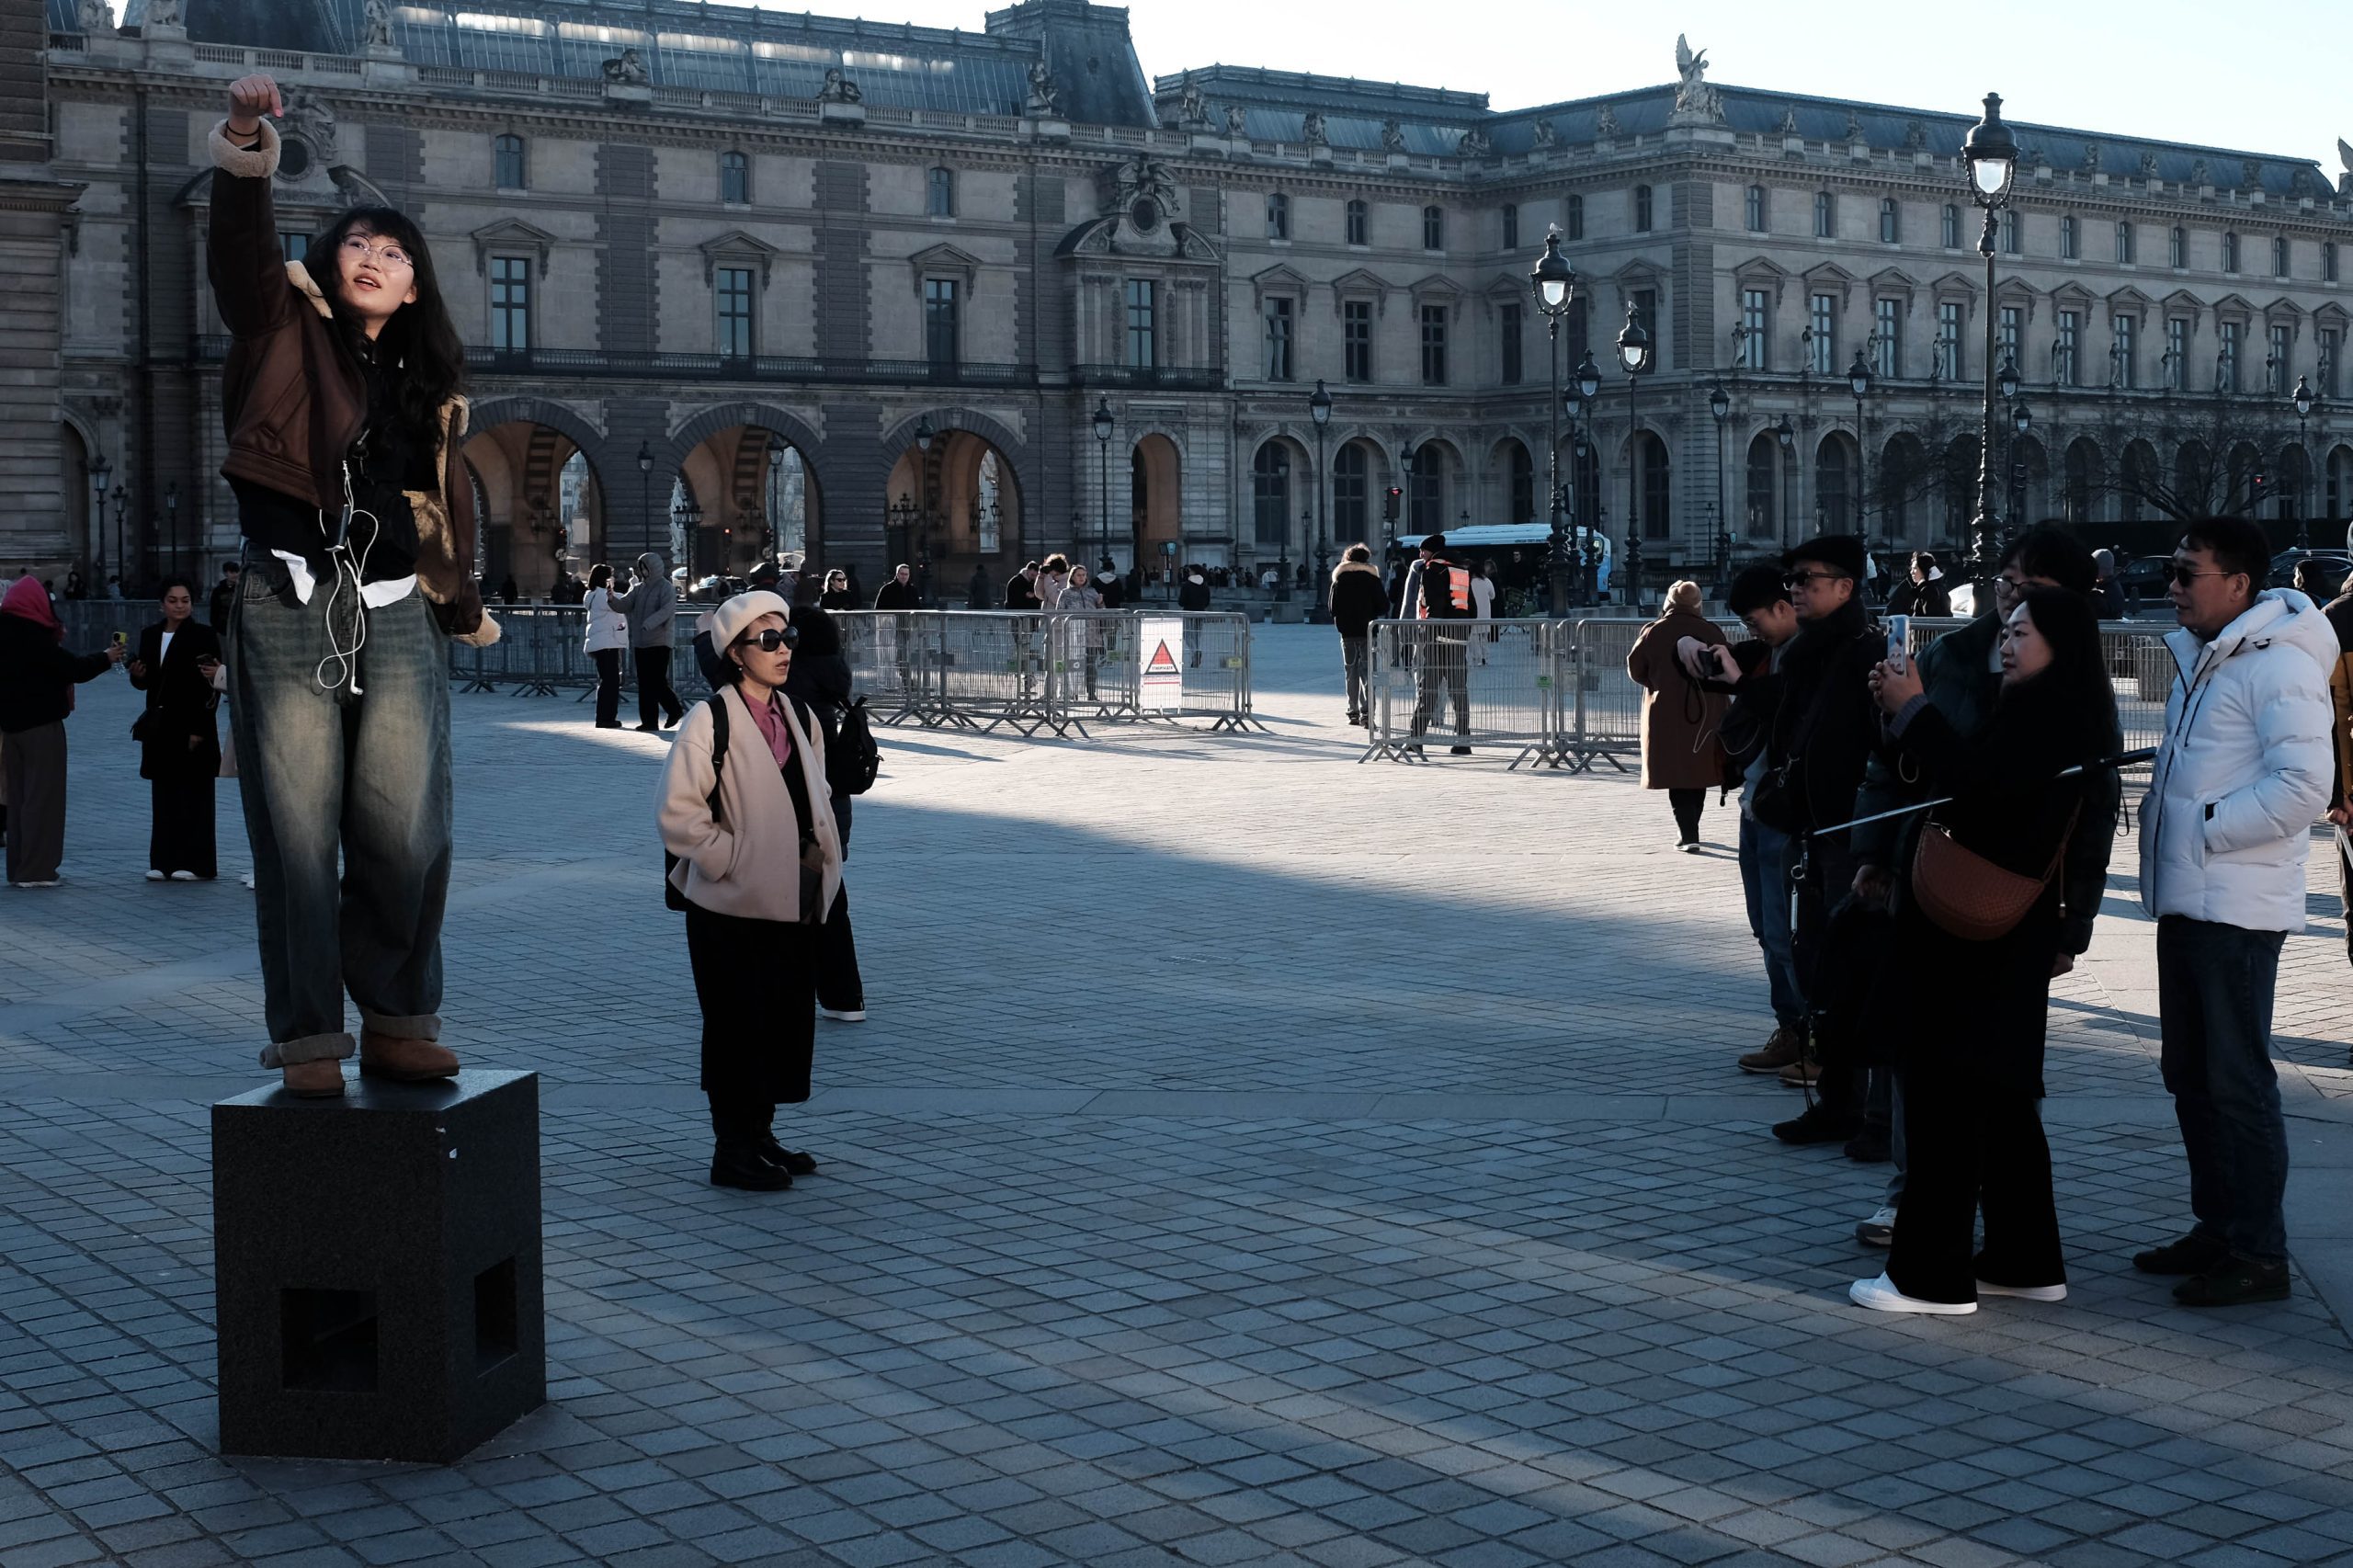
In Brugge
Last January, Jill and I took 2/3 of our kids to Belgium, The Netherlands, and France for a vacation. I'll skip the long story about United losing Jen's luggage and…
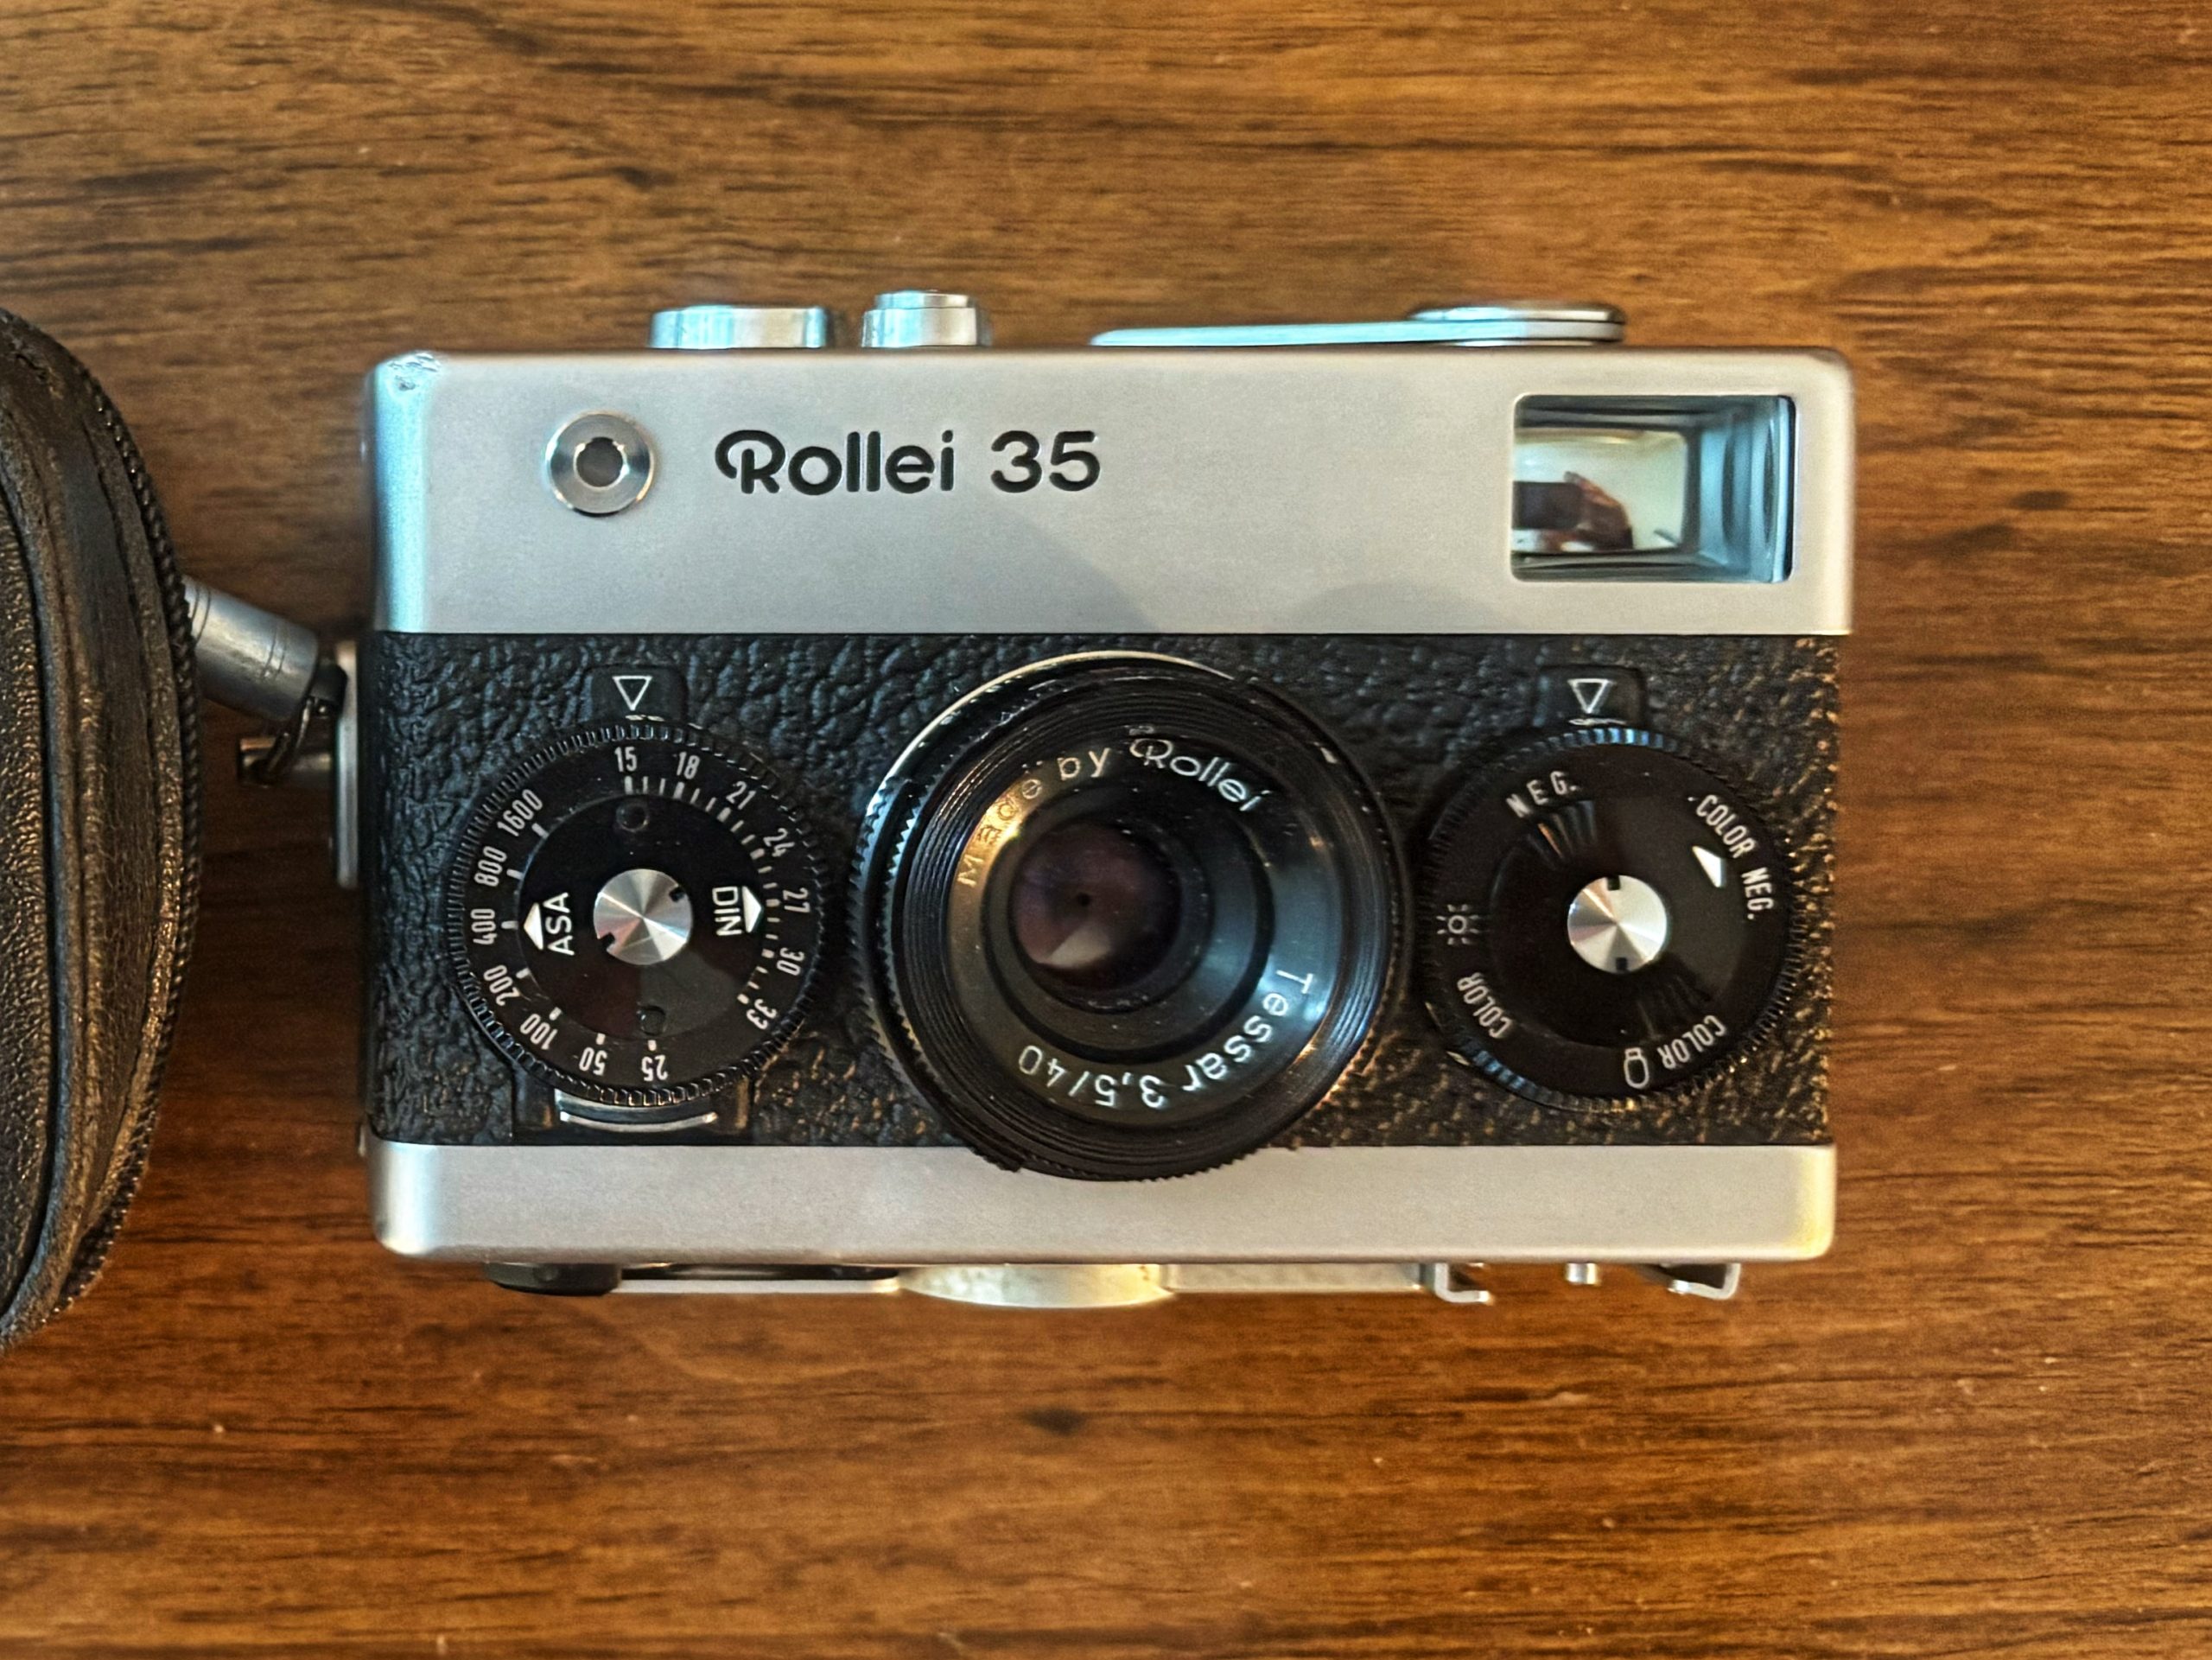
Rollei 35
I went through a phase a few months ago when I bought several film cameras at auction. I've tested every one and found some keepers (Olympus XA) and duds (Yashica…
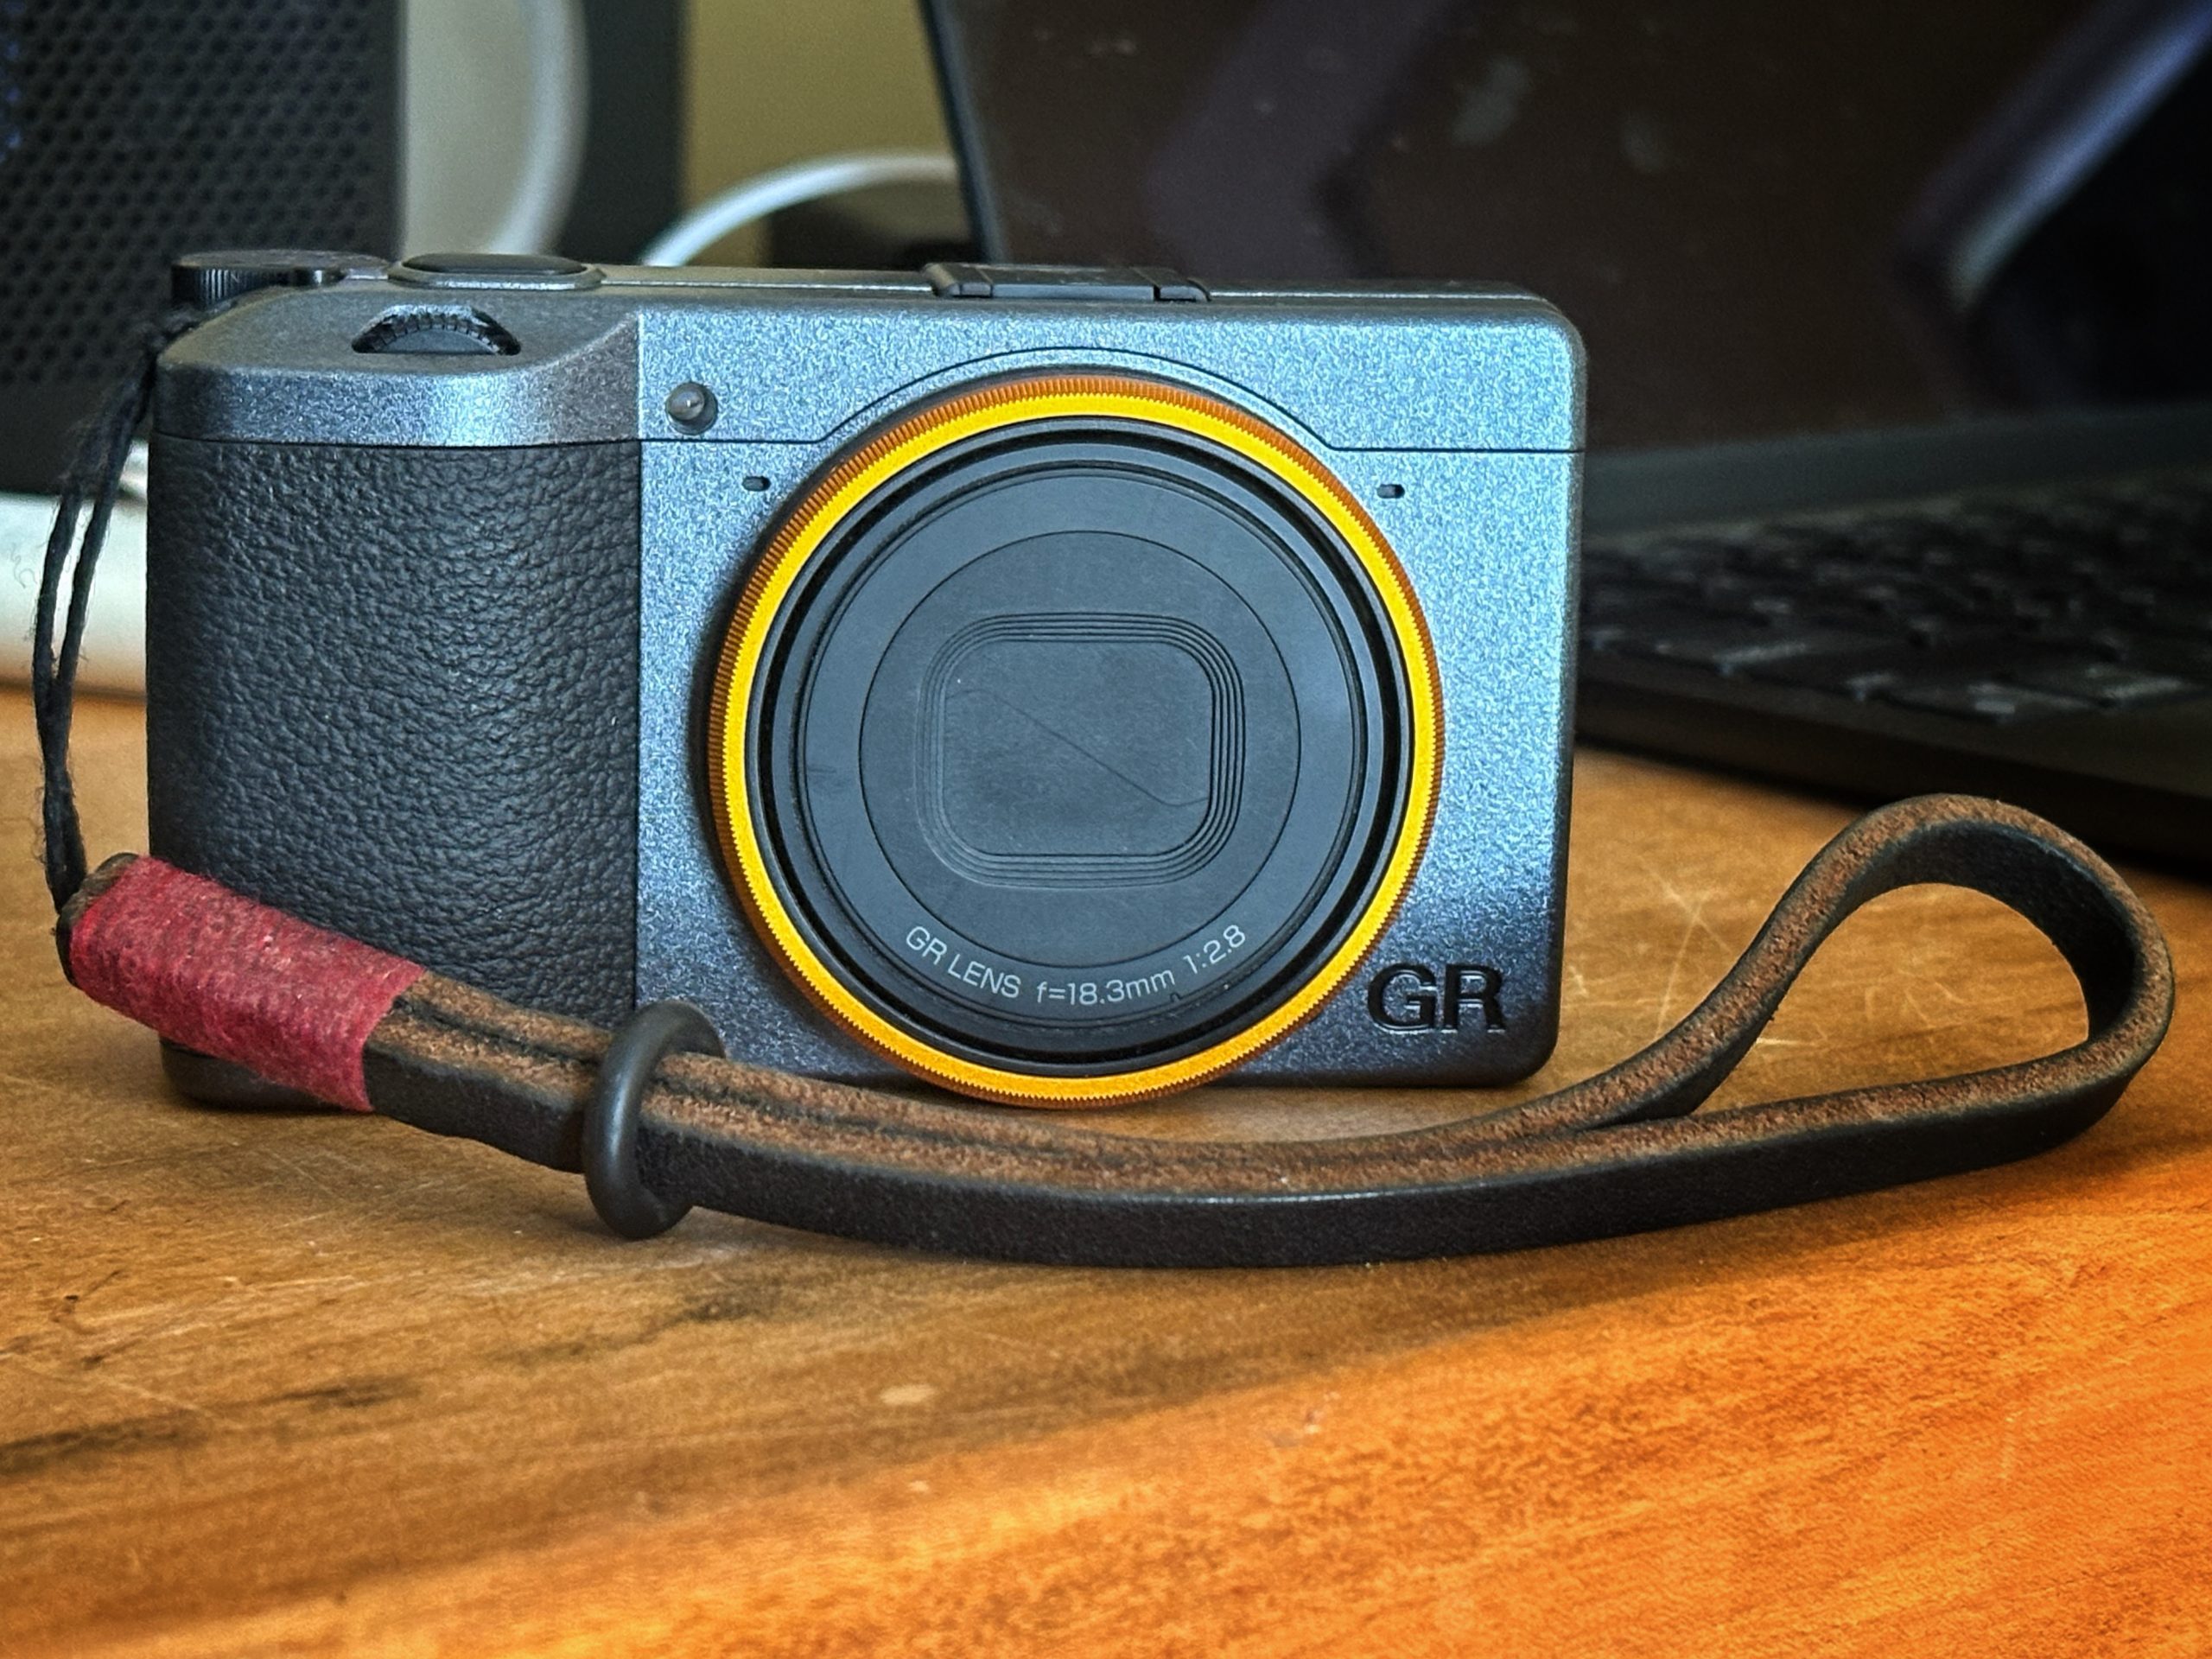
Ricoh GRIII, my perfect travel camera
Since 2013, the Ricoh GR has been my favorite travel camera. In 2018, I wrote about why the GR is so wonderful, and my opinion hasn't changed. I have options…

Finally, Sunshine
The North Country hasn't seen the sun in a while, so when it did come out I grabbed the opportunity to go for a ride. My route: South along the…
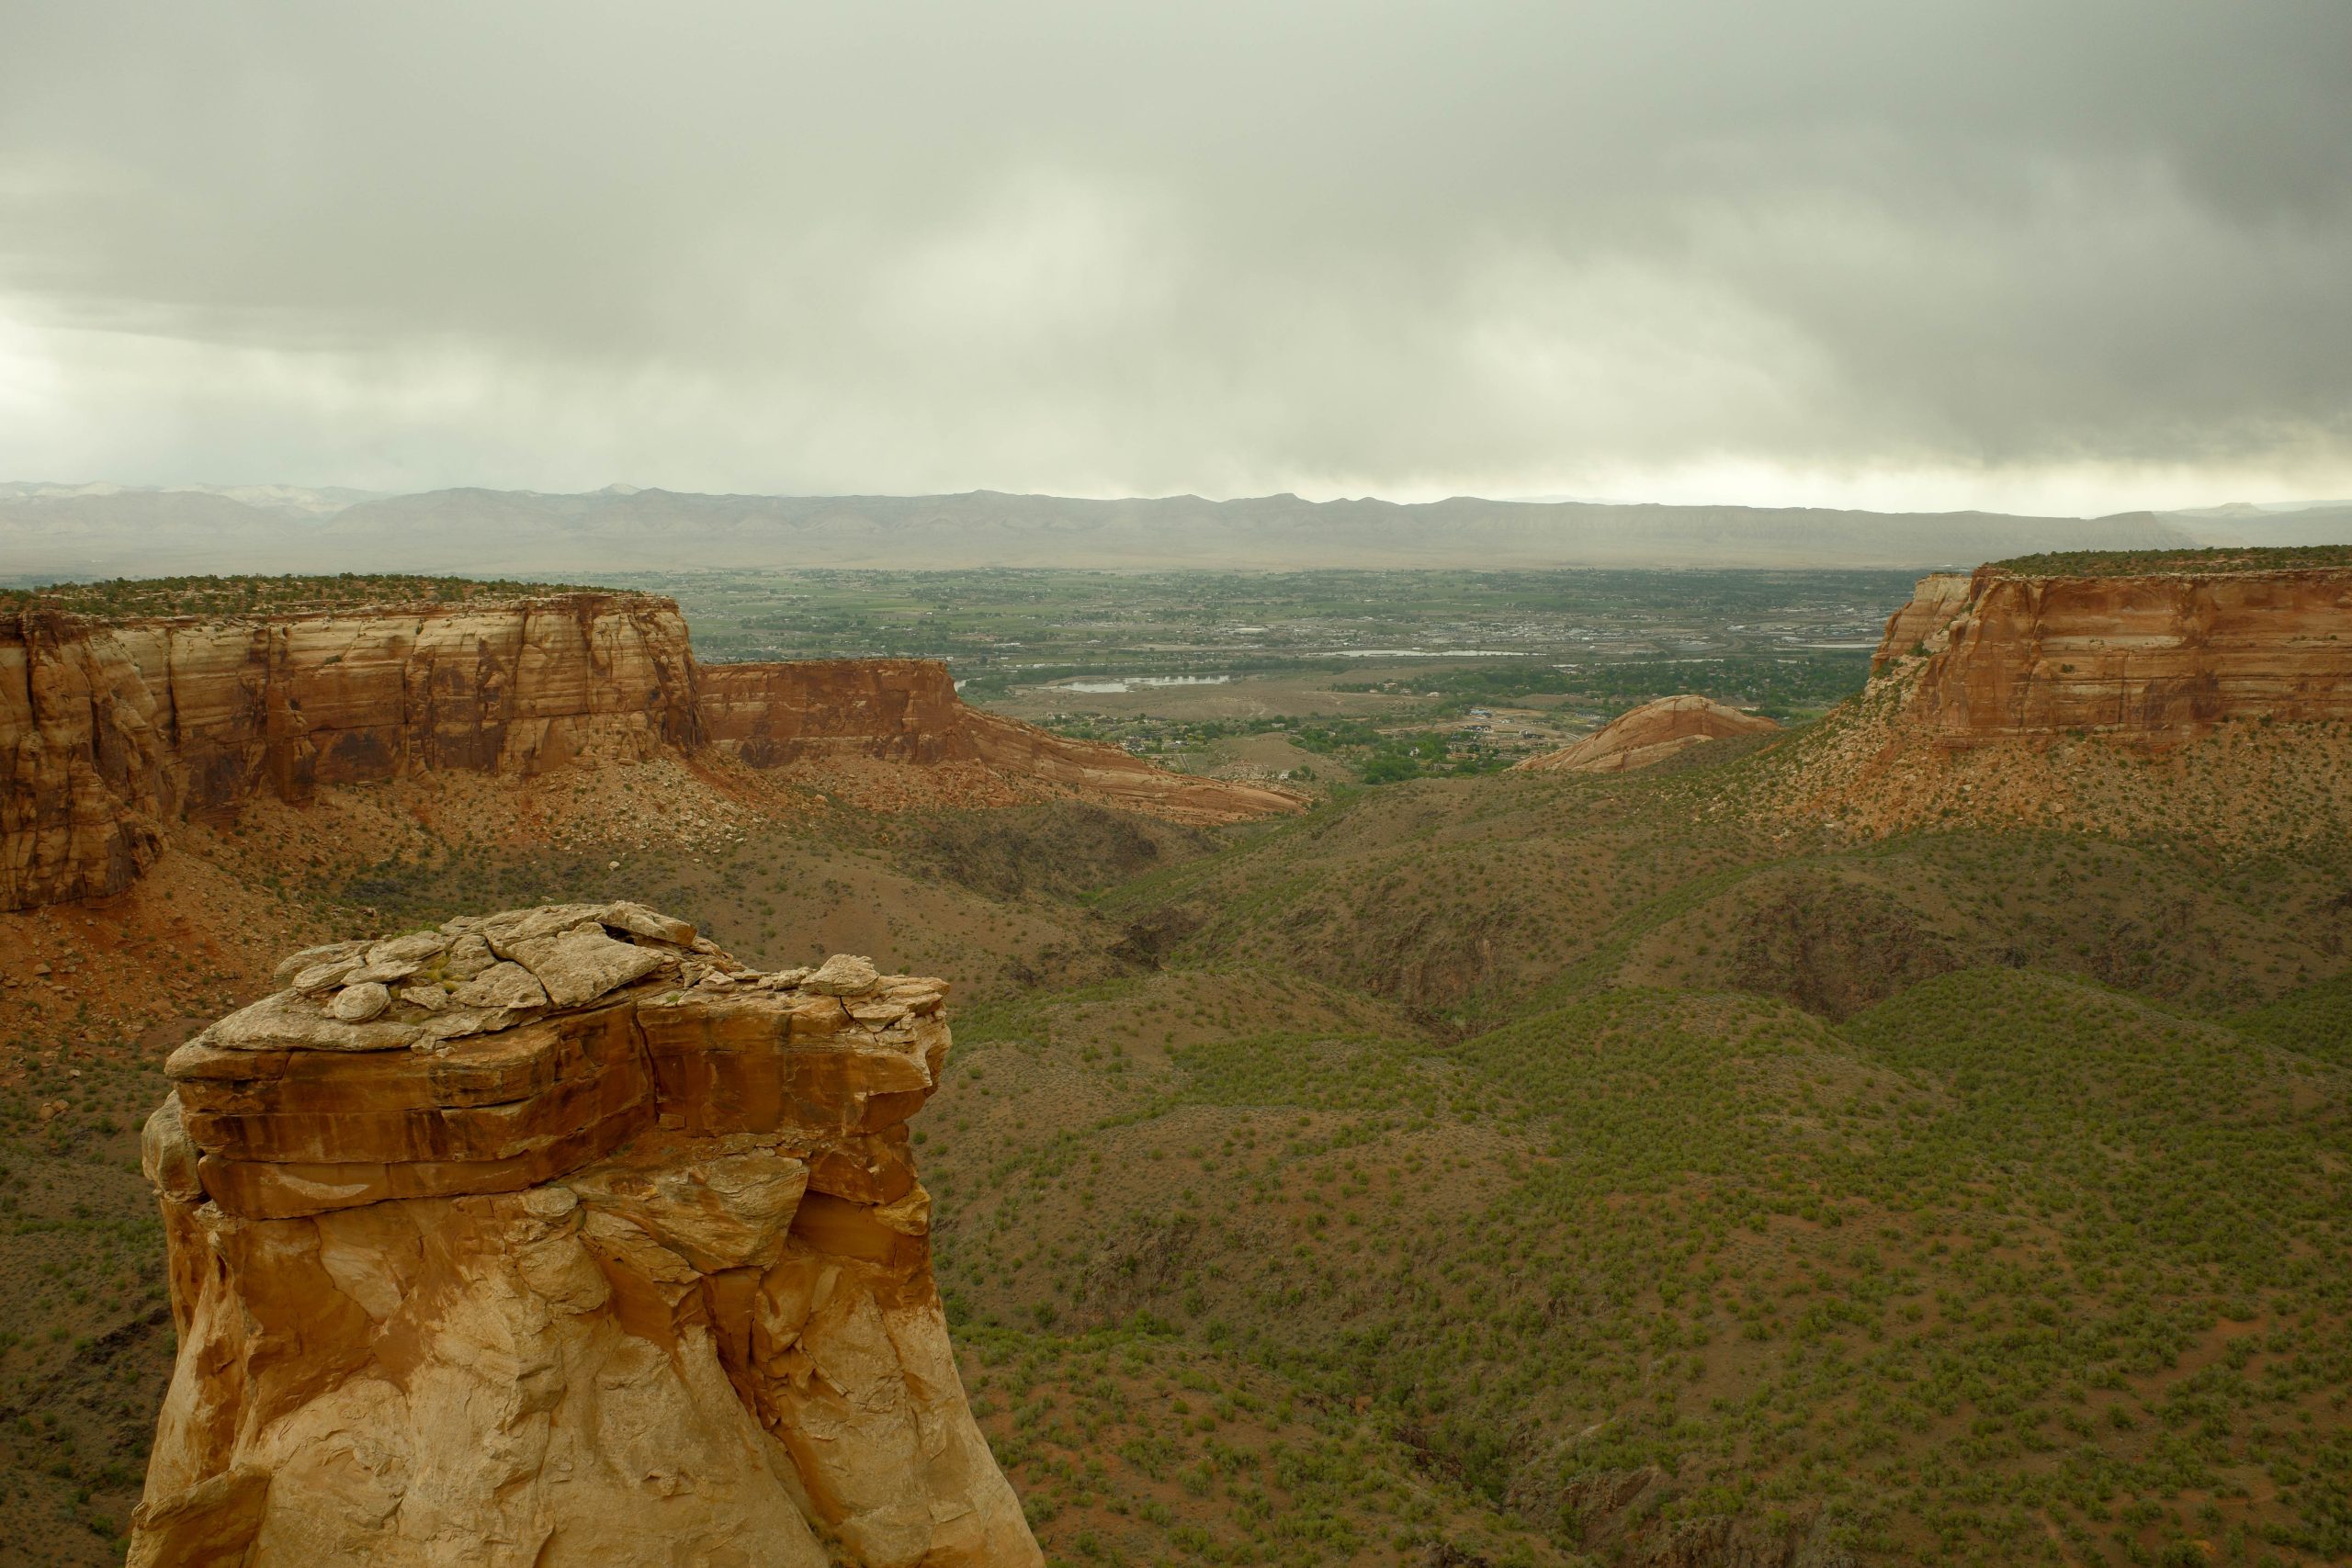
Colorado Whirlwind
Since coming back from Belgium and France in January, there's been a lot. New jobs (me and The Boy), a new semester (Jill), ongoing work on the house (those 15…
A long weekend in Albany and Vermont
After dressing up for the Breakthrough T1D Capital Region Gala, Jill and I spent a weekend wandering and relaxing in Albany and southern Vermont. I'd never seen the Empire State…

Wandering: New Orleans edition
We walked and strolled and rode the streetcars and hop-on/hop-off bus and ferry. Here's a bit of what we saw. Btw, I think Lucinda is onto something.